Get your tools ready
Make sure you have your tools installed prior to AEM project setup. There is a good article on how to achieve that on the official Adobe’s documentation:
Start with ready made archetype
AEM project structure can be quite complex. However, Adobe provides a maven archetype which is easy to install and customize, that can be fired with a single command from the terminal.
You can obtain the latest archetype from the GitHub repository: https://github.com/adobe/aem-project-archetype
Be sure to check out the documentation especially in terms of available customizations right from the start of the project. Some of them will be available to switch on later during development, some will be more difficult to include. That’s why you should carefully think through what you will be needing during project development.
For the sake of this tutorial, we will be interested in creating a project that is:
- running on AEM Cloud version,
- has multilanguage support,
- main site is United Kingdom, and main language is English,
- has enabled Dynamic Media,
- has enabled Forms Core Components
For AEM 6.5 the command will look as follows:
mvn -B org.apache.maven.plugins:maven-archetype-plugin:3.2.1:generate \
    -D archetypeGroupId=com.adobe.aem \
    -D archetypeArtifactId=aem-project-archetype \
    -D archetypeVersion=40 \
    -D appTitle="AEM WebDev" \
    -D appId="webdev" \
    -D groupId="com.aemwebdev" \
    -D artifactId="webdev" \
    -D package="com.aemwebdev" \
    -D version="0.0.1-SNAPSHOT" \
    -D singleCountry="n" \
    -D country="gb" \
    -D language="en" \
    -D includeFormscommunications="y" \
    -D includeFormsenrollment="y" \
    -D enableDynamicMedia="y" \
    -D enableSSR="y" \
    -D includeFormsheadless="y" \
    -D aemVersion="6.5.11"
For Cloud version the command will differ slightly:
mvn -B org.apache.maven.plugins:maven-archetype-plugin:3.2.1:generate \
    -D archetypeGroupId=com.adobe.aem \
    -D archetypeArtifactId=aem-project-archetype \
    -D archetypeVersion=40 \
    -D appTitle="AEM WebDev" \
    -D appId="webdev" \
    -D groupId="com.aemwebdev" \
    -D artifactId="webdev" \
    -D package="com.aemwebdev" \
    -D version="0.0.1-SNAPSHOT" \
    -D singleCountry="n" \
    -D country="gb" \
    -D language="en" \
    -D includeFormscommunications="y" \
    -D includeFormsenrollment="y" \
    -D enableDynamicMedia="y" \
    -D enableSSR="y" \
    -D includeFormsheadless="y" \
    -D aemVersion="cloud"
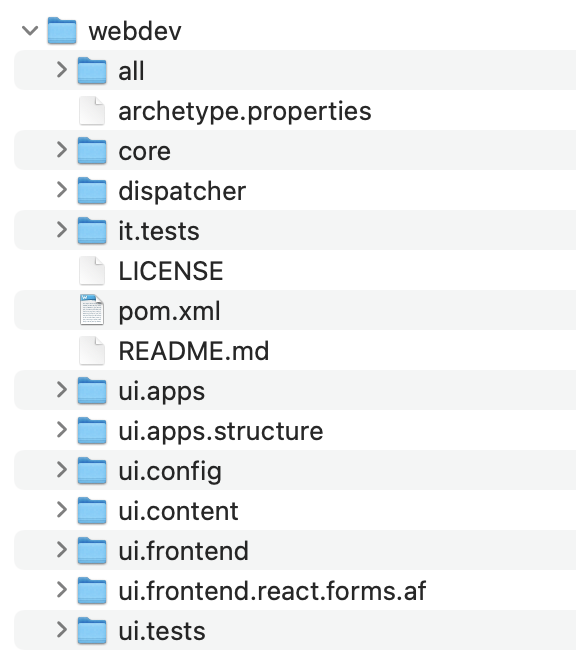
Once you have your settings ready, navigate to the directory of your choice in terminal and run the command there. The project structure should be ready in a moment, and should look like below:
AEM first start up
The official guide on start up for AEM Cloud is available here: https://experienceleague.adobe.com/docs/experience-manager-learn/cloud-service/local-development-environment-set-up/aem-runtime.html?lang=en
A shortened instruction for the first start up:
- Download your installation jar file from Adobe’s site,
- Navigate to the directory of your choice and create a new directory inside called ‘author’
- Put the jar file in the author directory, and rename it to aem-author-p4502
- Start the jar file by the command from terminal: java -jar aem-author-p4502.jar
- You will be prompted to provide admin password on first start up, do yourself a favor and use ‚admin’ for development instances that run only locally
- After the QuickStart finishes you should be greeted with the welcome login page, provide your admin password. (If for some reason it didn’t not appear, you should be able to find it under http://localhost:4502/ )
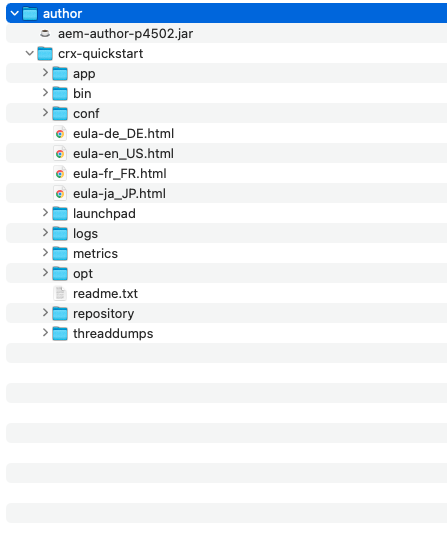
After successful start up, your author directory should look like below:
For later start ups you should use ready scripts available under author/crx-quickstart/bin, depending on your machine (sh for Mac, and bat for Windows). However, I strongly suggest to add an alias on your command’s console to that script so it’s as painless to start as writing a single word.
A sample alias command for Mac .zprofile/.bash_profile or .zshrc file (depending on your OS version) would be:
For starting up:
alias aem='cd YOUR_DIRECTORY_HERE/crx-quickstart/bin && sh start' For ending:
alias aemStop='cd YOUR_DIRECTORY_HERE/crx-quickstart/bin && sh stop' 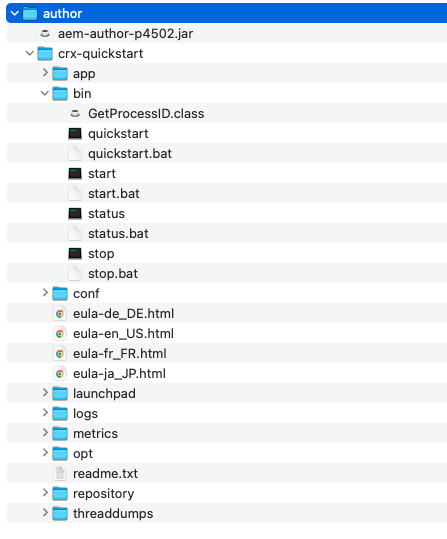
Building and deploying
Once you have your AEM instance running locally on port 4502 (the default port for author instance of AEM), you can proceed with building the project. To do this, preferably open the project in the IDE of your choice.
Here, we will be using IntelliJ. Open the project and hit ‚Trust the project’ on the initial opening prompt.
Run maven install command from the main project directory: mvn clean install -PautoInstallSinglePackage
If you experience problems during the build, make sure that your m2 directory for Maven contains the right public profile for Adobe. You can obtain it here: https://repo.adobe.com/index.html
Before the build, all you can see under sites directory is the default campaigns folder:
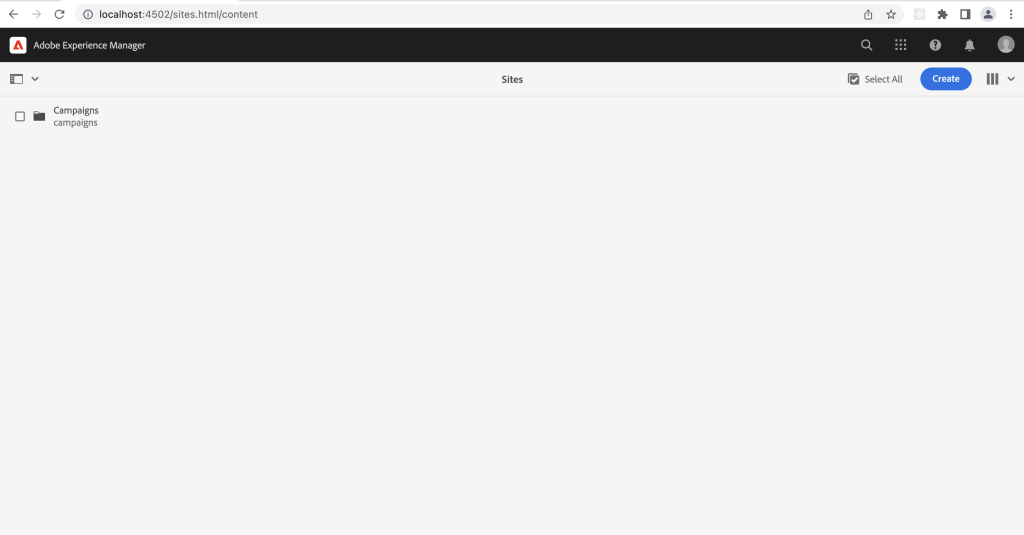
After a successful installation you should see the directories from the project build.
Known issues and problems
Missing/wrong version of uber-jar
Go to: http://localhost:4502/system/console/bundles
And check the state of your bundles, if any bundle is in state ‚installed’ this means there is something missing for it to start. Check what is exactly missing.
org.apache.sling.api.request,version=[2.5,3) -- Cannot be resolved
org.apache.sling.api.resource,version=[2.13,3) -- Cannot be resolved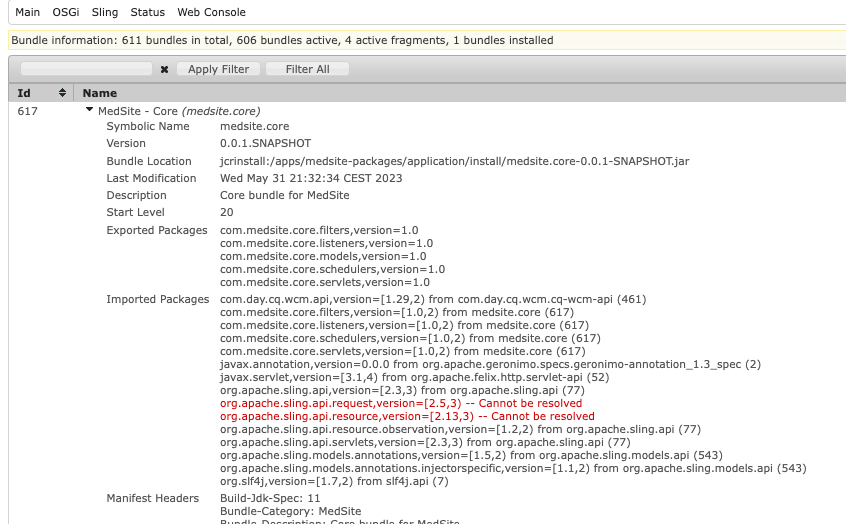
Solution:
First of all, check if there might be a newer service pack that goes along your chosen archetype. Install it and check if that helped.
You can also check the version of your uber-jar in the main pom file. It should reflect your product version exactly.
Go to: http://localhost:4502/system/console/status-productinfo

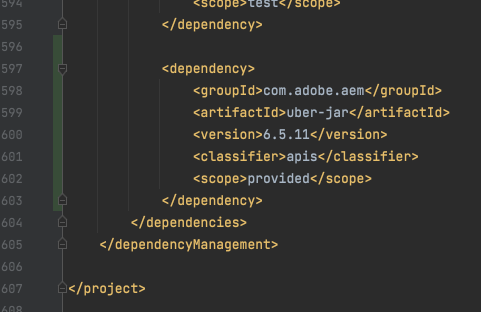
If this didn’t help, you can include the missing packages into your core/pom file, like this:
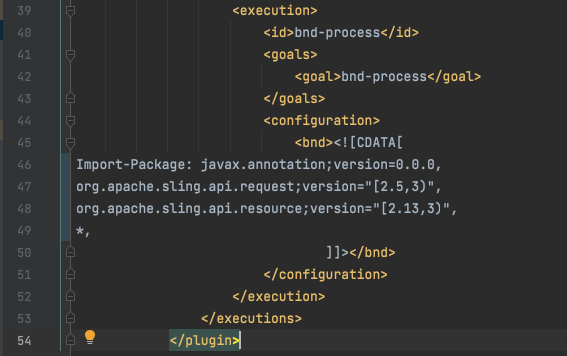
And if you are still facing some issues, for example blank content page, but the bundles are all in active/fragment state, there is a chance you might be missing newer core components package on your AEM instance. You can obtain a newer one here:
https://github.com/adobe/aem-core-wcm-components
There is a chance you will have to search for a proper one matching you service pack etc., you can find them here:
https://github.com/adobe/aem-core-wcm-components/blob/main/VERSIONS.md


Leave a Reply